So, you’ve got a bunch of contacts and need to get them into the Wetarseel dashboard, right? Maybe it’s a list of leads, customers, or just people you need to stay in touch with. Whatever the case, manually adding them one by one sounds like a total pain.
Luckily, Wetarseel makes it super easy to import all your contacts at once using a simple CSV file. But hold on—before you hit that “Import” button, you gotta make sure everything’s set up properly, or you’ll end up with a messy, incomplete contact list.
Don’t worry, though— we will walk you through the whole thing step by step so you can get it done without any hiccups. Let’s dive in!
Steps to Import Contacts to Wetarseel Dashboard
Step 1: Create Tags & Attributes
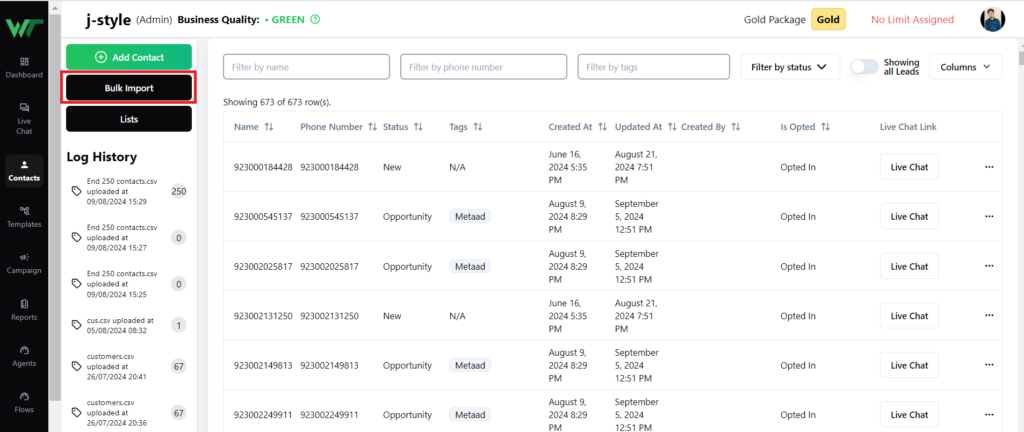
Before importing your contacts, you must define Tags & Attributes in Wetarseel to match the contact data structure in your CSV file.
- Go to “Manage” in the Wetarseel App.
- Create Tags & Attributes that correspond exactly to the columns in your CSV file (e.g., email, source, city, etc.).
- Ensure that these attributes match word-for-word with your CSV file headers to avoid discrepancies during the import.
Why is this important?
Creating the correct Tags & Attributes ensures that each data field is correctly assigned to the respective contact details when imported.
Step 2: Navigate to the Contacts Page & Click “Import”
- Once your attributes are set, go to the Contacts page in Wetarseel and:
- Click on the “Import” button, located at the top-right corner, next to the “Export” button.
- Now, a pop-up window will appear prompting you to upload your contact file.
Step 3: Prepare Your .CSV File in the Correct Format
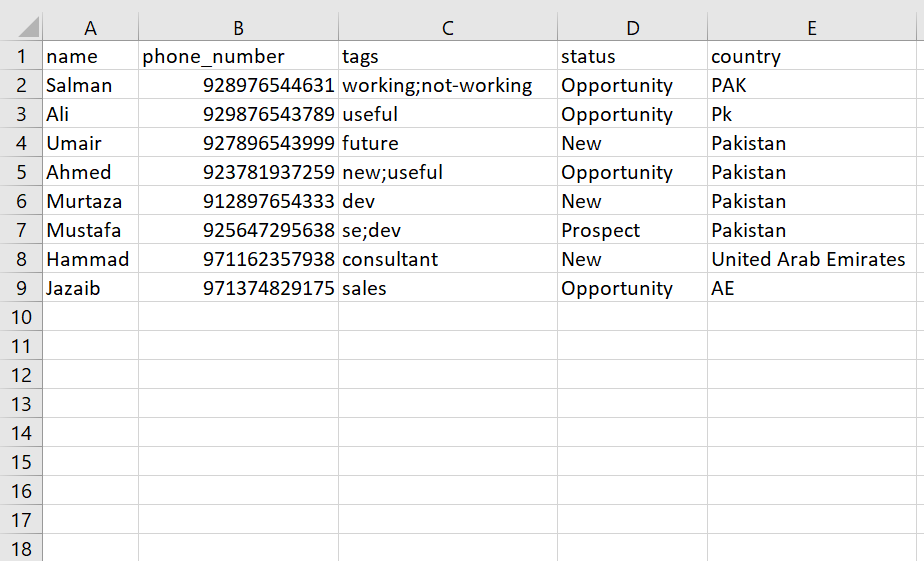
To successfully upload contacts, your CSV file must follow a specific structure:
- The first row should contain column headers (e.g., Name, Email, Phone Number, City, etc.).
- Custom attributes such as City, Email, and State should be clearly defined.
- Phone numbers must include the country code (e.g., 9715299311 923220205599) , + plus sign is not mandatory.
- Any fields left blank in the CSV file will be imported as empty in Wetarseel.
Important: The NAME and phone_numbers columns in the sample Excel sheet are mandatory fields. Ensure they are correctly filled before uploading.
Step 4: Upload Your Contacts (.CSV File Format Only)
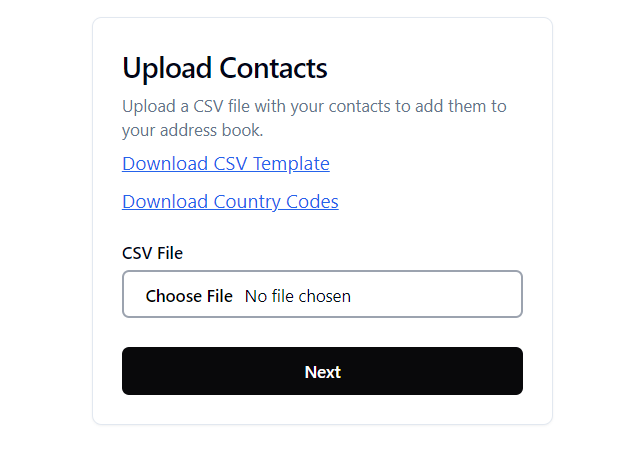
- Click “Upload File” in the pop-up window.
- Select the .csv file from your system.
- Ensure that the file format is CSV (not XLSX or any other format).
Once uploaded, proceed to the next step.
Tip: If you’re working with Excel, make sure to save the file as a CSV before uploading.
Step 5: Map Attributes with Column Entries
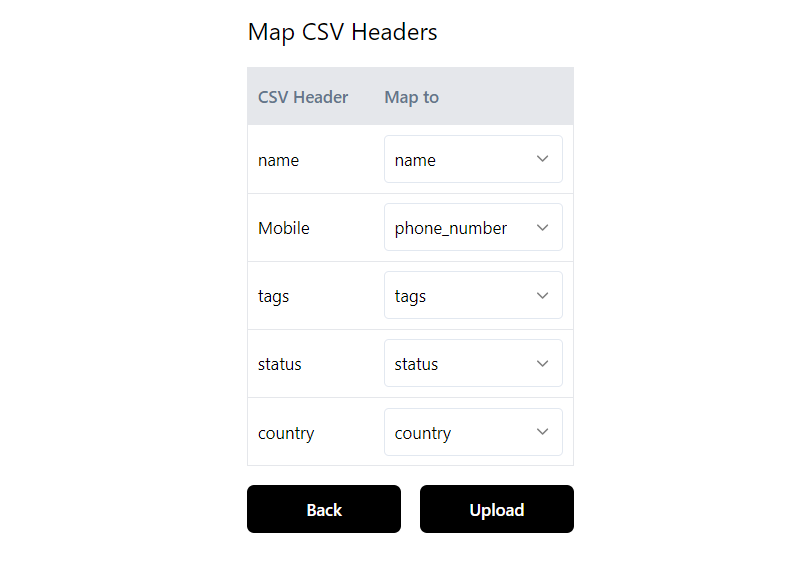
Once the file is uploaded, you need to map each column from your CSV file to the corresponding attributes in Wetarseel.
- On the left side, you’ll see column headings from your CSV file.
- On the right side, select the matching attributes in Wetarseel.
Example:
Name → User Name
Mobile Number → Phone Number
Email Address → Email
Accurate mapping ensures that the data is imported into the correct fields without errors.
Step 6: Click the “Import” Button
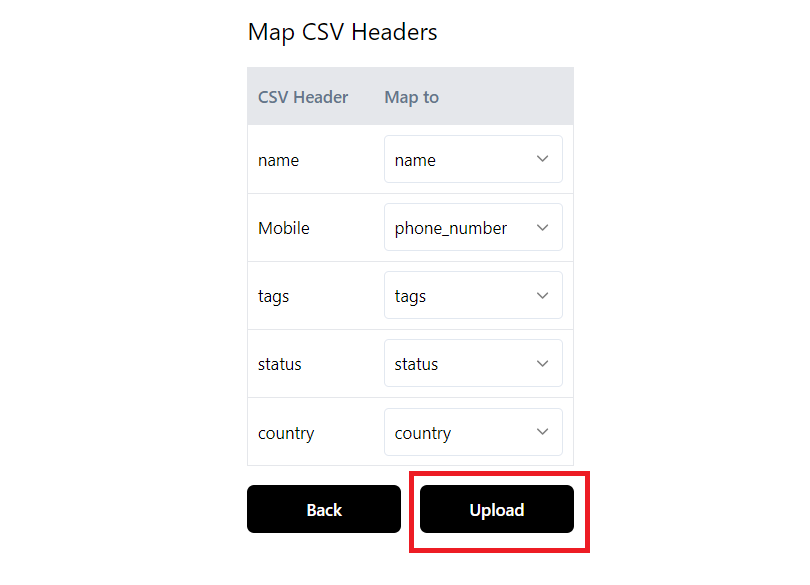
Once all columns are mapped correctly:
- Click the “Import” button (bottom-right of the screen).
- The system will process the contacts, and all valid entries will be imported into Wetarseel.
This is the final step to import contacts to the Wetarseel dashboard!
Step 7: Verify Contact History
After the import, you can verify whether all contacts were successfully added.
Click on “View History” to check the import summary.
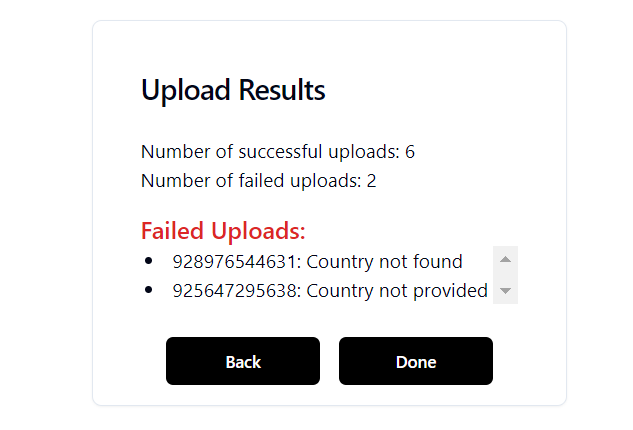
Here, you will see the list of contacts added, updated, or failed to import.
- Contacts Added: Successfully imported contacts.
- Contacts Updated: If a contact already exists but with updated attributes, it will be updated instead of duplicated.
- Contacts Failed: If any contacts fail to import, they will be listed with reasons for failure.
Final Words
Importing contacts is just the beginning—unlock the full potential of WhatsApp automation with Wetasreel. If you haven’t set up your account yet, follow this guide to get started. Sign up today and streamline your customer interactions effortlessly.

